
Record the exact flow problem
Run the shower at its normal temperature and setting long enough to observe the pattern, keeping clear of water that may be too hot. Photograph the spray face. Check whether one group of nozzles is blocked, every setting is weak, a handheld hose is kinked, the selector is between settings, or water escapes at the threaded joint. Then test another nearby fixture. A head-only problem can often be cleaned; a room-wide or whole-home pressure change needs a broader diagnosis.
For a repeatable before-and-after check, use the same shower setting and control position each time. Catch water for a short measured interval in a container large enough to avoid overflow, record the volume, and repeat only after cleaning. This is a comparison, not a reason to remove a flow regulator. EPA’s WaterSense program treats water efficiency and shower performance together; replacing or altering a certified device can change both.
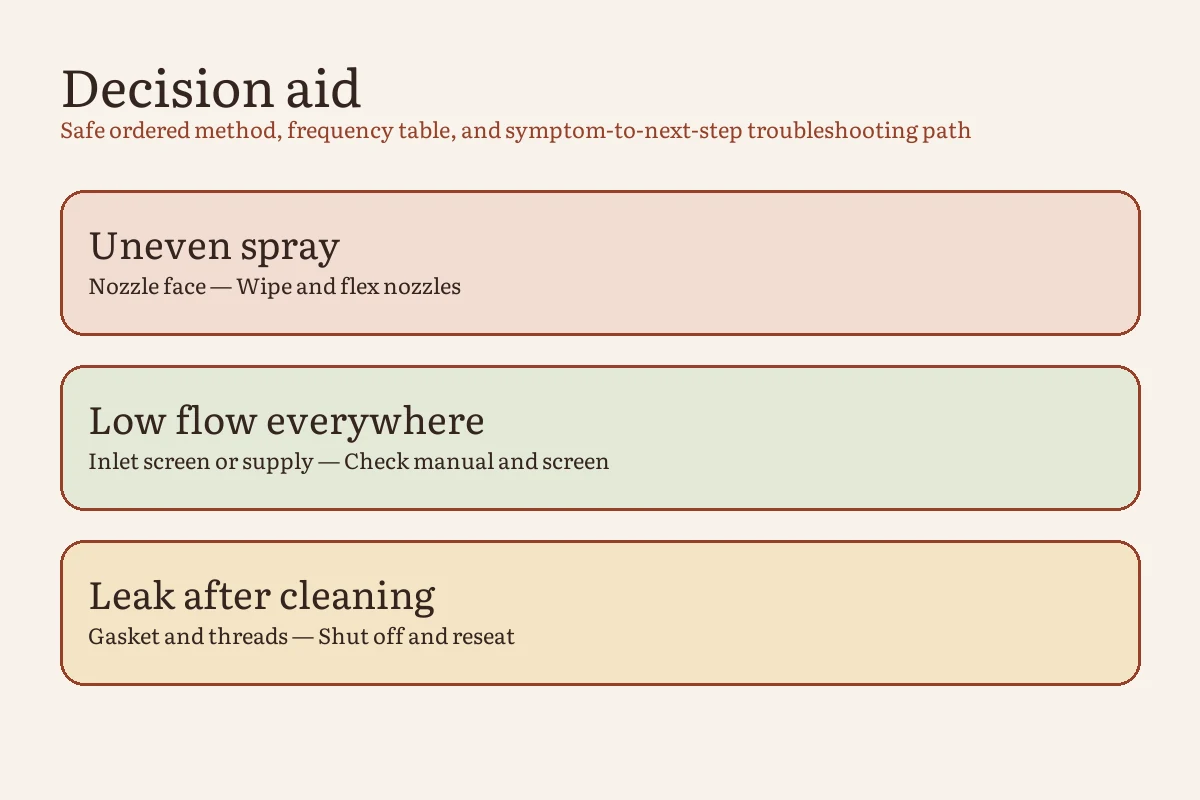
Shower flow symptom-to-next-step table
| Symptom | Check first | Cleaning step | When cleaning is not the answer |
|---|---|---|---|
| A few jets spray sideways or not at all | Visible mineral film and whether the nozzles are designed to flex | Wipe the face and rub only the cleanable nozzles according to the care guide | A nozzle is split, missing, or pushed into the head |
| Every setting is weak; other fixtures are normal | Selector position, hose kink, inlet screen, and model cleaning instructions | Clean the approved screen or descale approved removable parts | The screen is damaged, a cartridge is blocked, or the fixture is not user-serviceable |
| Several fixtures changed at the same time | Shutoff positions, building work, water utility notices, and pressure-regulating equipment | None until the supply cause is identified | Contact the utility, building manager, or qualified plumber as appropriate |
| Water leaks where the head meets the arm | Gasket, screen washer, clean threads, alignment, and model instructions | Reassemble by hand using only the specified seal or tape | The nut, arm, threads, or wall connection is cracked or moves |
| Shower drips long after residual water should drain | Whether it stops with the head removed and the valve fully off | Cleaning the head may release trapped water but does not repair a valve | Persistent flow with the head removed points to valve or plumbing service |
| Water temperature or pressure changes suddenly during use | Stop using the shower and check the control/valve system | Do not treat it as a mineral-only problem | Arrange qualified diagnosis, especially where scalding is possible |
Start with the least invasive cleaning level
- Read the fixture care page. Identify the brand, model, finish, cleanable nozzle type, approved solution, contact time, tools, and whether the inlet screen may be removed. Electronic, lighted, filtered, or multi-part heads may have additional restrictions.
- Turn the shower off and let the fixture cool. Protect the tub or shower floor from a dropped tool. Wear the protection specified on the cleaner label, ventilate the room, and keep products away from children and pets.
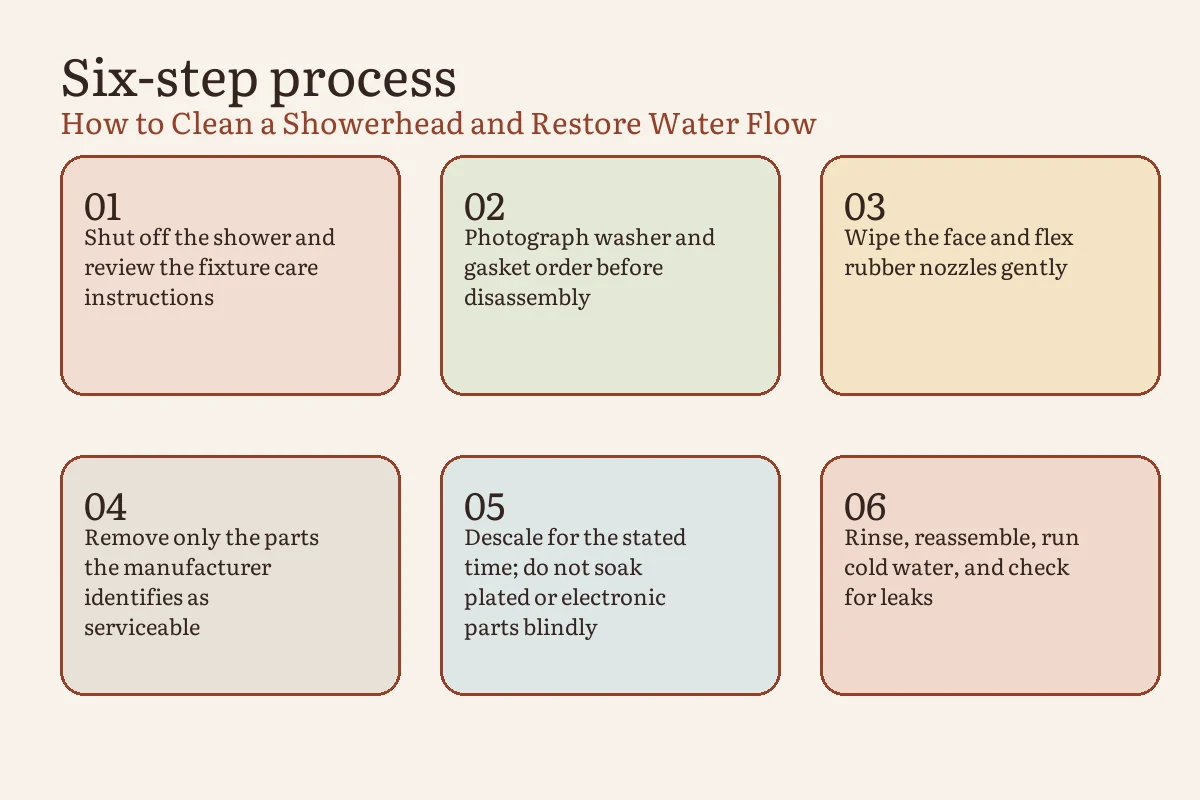
- Clean the exterior and spray face. Use a damp soft cloth. Delta’s guidance for its Touch-Clean spray holes is to wipe or rub the face to loosen deposits. Kohler advises testing a cleaner on an inconspicuous spot. Avoid abrasive pads, hard picks, and aggressive scrubbing that can scratch a finish or damage a nozzle.
- Test before disassembly. Run the same setting briefly. If the pattern and comparative volume are restored, stop. More chemical contact does not improve an already-clear head.
- Remove the head only if the maker permits it. Photograph the gasket and screen order. Support the shower arm so torque is not transferred into the wall. Delta’s current instructions for its models generally call for hand tightening and warn that overtightening can crack a nut or cause a leak.
- Clean only approved removable parts. For compatible Delta non-Touch-Clean heads, the manufacturer recommends a 50/50 white-vinegar-and-water soak; its model guidance provides the applicable time. Another brand or finish may require a different product, dilution, or no soaking at all.
- Rinse, reassemble, and leak-check. Flush away loosened debris, seat the original screen and gasket correctly, align threads by hand, and tighten only as instructed. Run cold or comfortably warm water first and inspect the joint, wall penetration, hose, and selector.
Use the cleaner the finish can tolerate
Vinegar is common advice, but compatibility is model-specific. The same manufacturer may publish different methods for Touch-Clean nozzles, plated finishes, rain heads, filtered fixtures, or electronic products. Do not leave an attached plastic bag of solution against a finish for an arbitrary overnight period. It can expose joints, coatings, adhesives, and non-target parts longer than intended.
Use one product at a time and follow the label. Never combine vinegar or an acidic descaler with bleach, disinfectant, or another cleaner. Rinse the showerhead and tools before a different product is used anywhere nearby. If a cleaner discolors, dulls, softens, or makes the finish tacky, stop, rinse as directed, and contact the manufacturer.
| Cleaning level | Use it when | Needed evidence | Stop condition |
|---|---|---|---|
| Soft face wipe | Deposits are visible on flexible or maker-approved nozzles | Care instructions allow wiping or rubbing | Spray pattern returns or nozzle damage appears |
| Approved in-place cleaner | The manufacturer names a product for the installed finish | Exact dilution, application, and contact time | Finish changes or solution reaches an excluded part |
| Remove and soak | The head is removable and the manufacturer approves the solution | Model-specific part, solution, time, and reassembly order | Connection is seized, arm moves, or electronics cannot be separated |
| Screen or hose service | Whole-head flow remains weak and the part is user-serviceable | Diagram showing gasket, screen, and flow path | Screen, threads, hose, or seal is damaged |
| Fixture or plumbing service | Other fixtures are weak, leaks persist, or cleaning has no effect | Before/after observations and supply comparison | No further chemical or force-based attempts |
Do not remove or drill the flow-control parts
A screen, gasket, check valve, and flow-regulating component can look like debris to someone unfamiliar with the assembly. Cleaning a maker-identified screen is different from removing a regulator. Do not drill nozzles, enlarge holes, remove restrictors, or omit a gasket to chase higher flow. Those changes can waste water, alter spray performance, violate product certification or local requirements, create leaks, and void coverage.
If the clean head still feels unsatisfactory but the measured flow matches its rating, choose a replacement designed for the desired spray rather than modifying the existing one. EPA says WaterSense-labeled showerheads are independently certified for efficiency plus spray force, coverage, and pressure compensation.
Know when the problem is behind the wall
Stop if the shower arm rotates at the wall, the escutcheon moves, water appears behind the finish, the joint will not align by hand, or a leak continues after correct gasket installation. A loose drop-ear fitting, damaged threads, blocked valve cartridge, failing pressure-balancing valve, or supply problem is outside a showerhead-cleaning task.
A sudden pressure or temperature-control change can create a scalding risk. Do not keep testing under the spray. Close the control, document what happened, and arrange model-appropriate plumbing or valve service.
Final flow and leak check
- The spray face is clean with no scratched finish, split nozzle, or trapped tool.
- The screen, gasket, hose, and selector are present and seated in their original order.
- The joint remains dry while each setting runs and for several minutes afterward.
- The before-and-after comparison uses the same control position and spray mode.
- Other fixtures behave normally; any broader pressure change has been referred for diagnosis.
Frequently asked questions
How long should a showerhead soak in vinegar?
Use only the duration published for the exact model and finish. Delta, for example, gives specific vinegar-and-water methods for particular heads, while another product may call for face wiping or a proprietary cleaner. An arbitrary overnight soak is not a universal rule.
Can I clean the nozzles with a needle?
Do not use a hard pick unless the manufacturer explicitly instructs it. A needle can enlarge, puncture, or push material into the nozzle. Start with the approved wipe, flexible-nozzle rub, soft brush, or soak.
Why is the pressure still low after cleaning?
Check whether every spray mode is affected, whether the hose is kinked, whether the inlet screen is correctly installed, and whether nearby fixtures also changed. Persistent head-only restriction may need fixture service; multiple affected fixtures point to the supply, valve, building, or utility.
Sources and editorial method
Every Inch Home created the symptom table, cleaning-level ladder, and final check for this guide. Model examples and reassembly cautions were checked against current Delta and Kohler care information; efficiency and performance context was checked against EPA WaterSense. The exact fixture’s instructions control.